Exporting Your Video
When you are done editing, export your video to generate the final file ready to post on any platform. Rendering happens in the cloud, so you can close the browser and come back later to download.
How to Export
Click the Export button
Wait for rendering to complete
Download your video

Export Format and Resolution
All exports are rendered as MP4 (H.264), the most widely compatible format for social media platforms, messaging apps, and video players.
The resolution of your exported video matches the aspect ratio you selected in the editor:
9:16
1080 x 1920
Stories, Reels, TikTok
16:9
1920 x 1080
YouTube, Landscape
1:1
1080 x 1080
Instagram Feed
4:5
1080 x 1350
Instagram Portrait
Watermark
Whether a watermark is included depends on your plan. The free plan adds a VDClip watermark to exported videos. Paid plans export without the watermark.
Visit the pricing page to see which plans include watermark-free exports and other export features.
Project Versions
Every time you export a video, VDClip saves it as a project version. This means you can:
- Download previous exports without rendering again
- Compare different versions of the same project
- Access your render history from the project settings panel
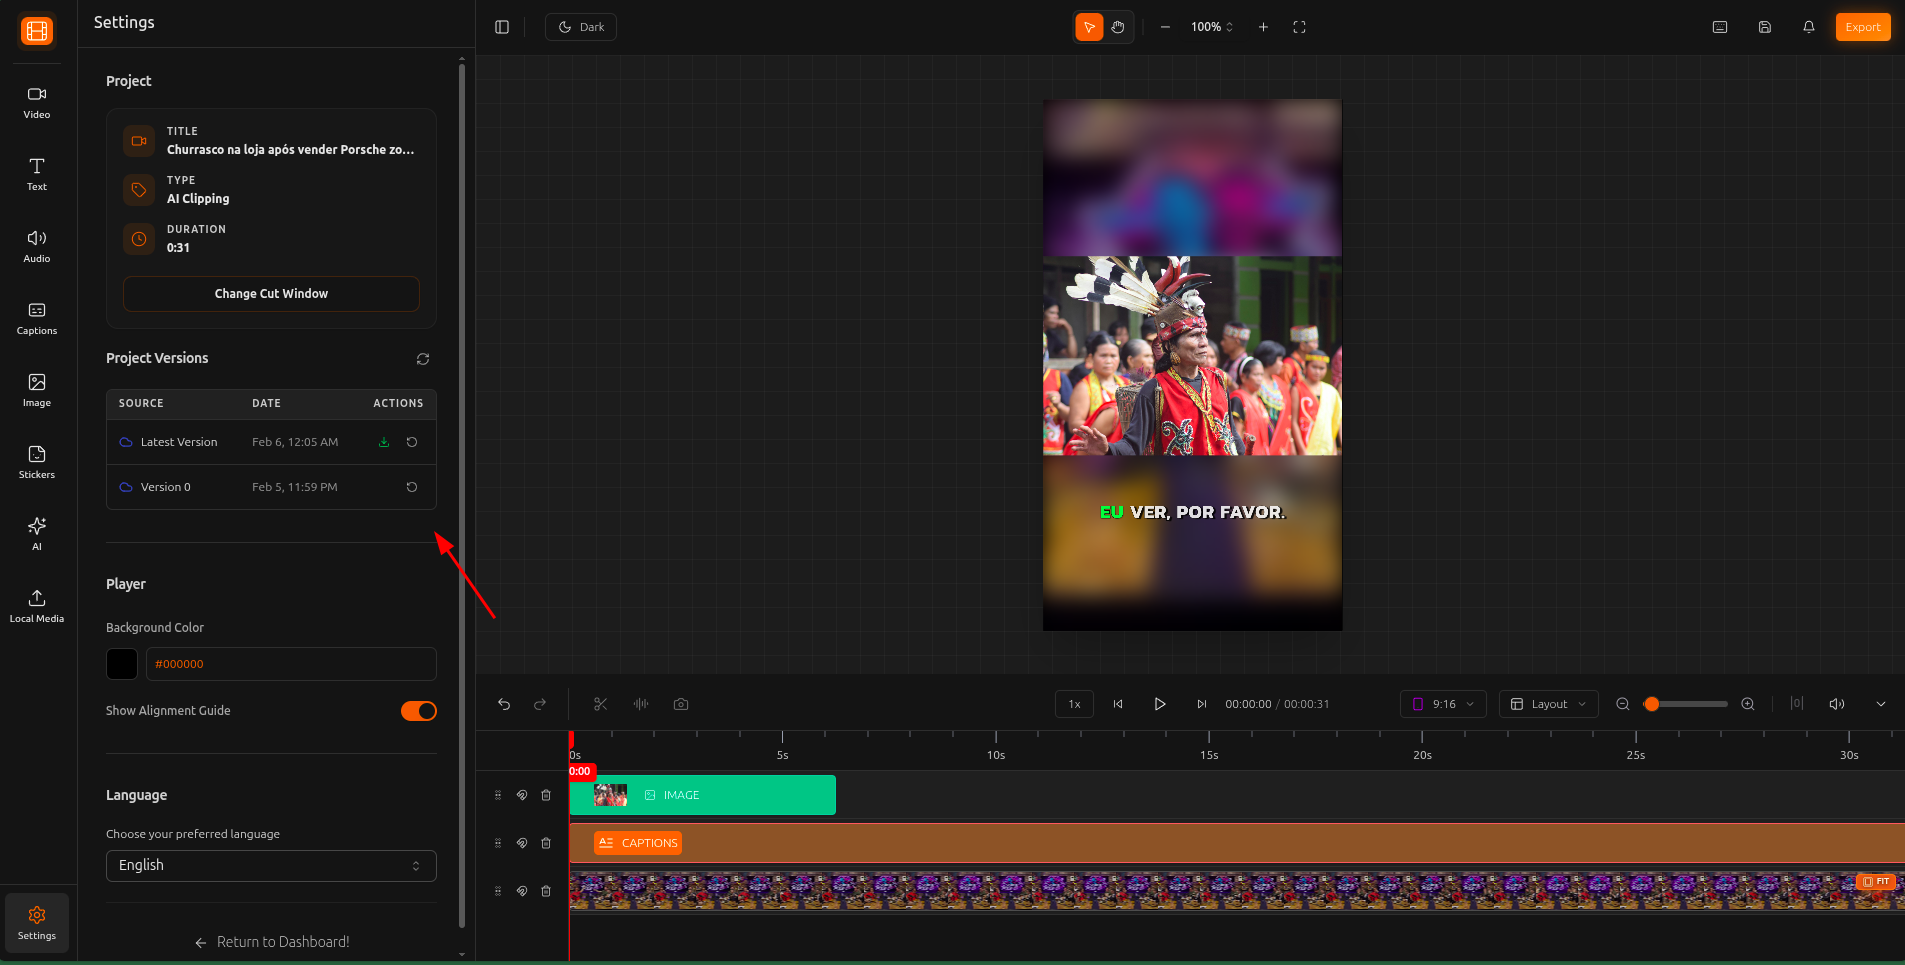
You can find your project versions in the project settings, accessible from the editor toolbar.
Batch Rendering
You can render multiple clips at the same time. Each clip in your project can be exported independently. Start one export, switch to another clip, and start another export. All renders run in parallel in the cloud.
This is especially useful when processing results from AI Clipping, where you may have several clips to export at once.
After Exporting
Once your video is ready:
- Download the MP4 file directly to your device
- Post from VDClip: if you have connected social media accounts in the Calendar, you can schedule or publish the video directly
- Re-export anytime if you make further edits. A new version will be created
Tips & Best Practices
Play through your entire video in the editor preview before starting an export. This helps you catch issues with timing, captions, or audio levels before using credits.
Make sure background music is not too loud compared to speech. Use the volume controls in the timeline to balance audio before exporting.
If you have multiple clips, export just one first to verify the result looks correct. Then proceed with the rest.
Choose your aspect ratio before editing. 9:16 is ideal for TikTok, Reels, and Stories. 16:9 works best for YouTube. 1:1 and 4:5 are great for Instagram feed posts.
Rendering happens in the cloud. You do not need to keep the browser open. Come back later and download your video from the project versions.