Keyframes
Keyframes let you animate an element over time. You set a value at one moment and a different value at another, and the editor smoothly transitions between them frame by frame. This is how you create movement, fades, zooms, spins and other dynamic effects on any element in your project.
What You Can Animate
Each property has its own keyframe track, so you can animate several properties on the same element independently.
Position
Move an element across the canvas. Position also supports a motion path for curved movement.
Scale
Grow or shrink an element to create zoom in and zoom out effects.
Rotation
Spin an element clockwise or counterclockwise over time.
Opacity
Fade an element in or out by animating its transparency.
Filters
Animate blur, brightness, contrast and saturation for gradual visual changes.
Volume
Ramp audio up or down over time for smooth fades on audio and video.
Color
Animate the color of text and captions between two values (phased feature).
Every property is independent
You can animate position and opacity at the same time, with different timing and different easing on each. The tracks do not interfere with one another.
The Keyframe Flow
Animating a property follows four simple steps: add keyframes, move them in time, adjust the easing, then reuse them with copy and paste.
Animate a property
Move keyframes on the strip
Adjust the easing
Copy and paste
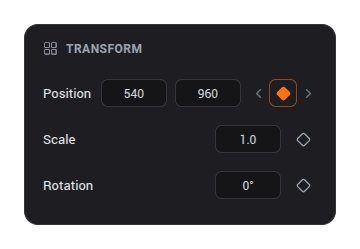
Add the first keyframe with the diamond
The diamond icon next to each animatable property is the switch that turns animation on. When it is off, the property holds a single static value. When you click it, the property starts recording keyframes: the current value is captured at the playhead as a diamond on the track.
Move keyframes on the on-clip strip
Once a property is animated, the editor draws a keyframe strip on the element in the timeline. Each diamond is one keyframe. You can drag them along the strip to retime the animation without leaving the timeline.

Shape the motion with easing
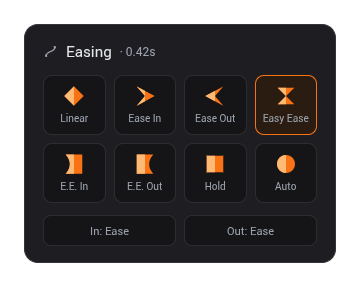
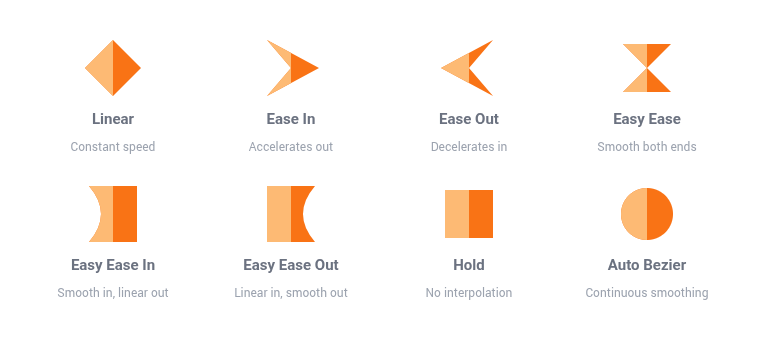
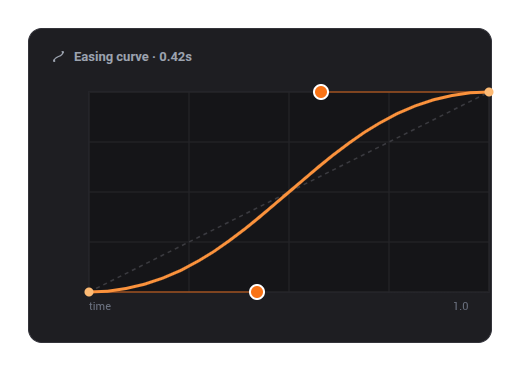
Easing controls how the value accelerates and decelerates between two keyframes. VDClip uses an After Effects style model with independent ease in and ease out, a set of presets, and a curve graph that previews the result. The AE style icons next to each keyframe show the current easing direction at a glance.
Linear
Constant speed from start to finish. The default when no easing is applied.
Ease In
Starts slow and speeds up. Good for elements leaving the screen.
Ease Out
Starts fast and slows down. Good for elements settling into place.
Ease
Slow at both ends with speed in the middle, for a natural feel.
Copy and paste keyframes
You can copy keyframes from one point in time and paste them elsewhere, which is the fastest way to repeat an animation. Select the keyframes you want, copy, move the playhead to the target position, and paste.
Ctrl / Cmd + CCopy the selected keyframes at the current timeCtrl / Cmd + VPaste the copied keyframes at the playheadTips & Best Practices
Every animation needs at least a start and an end. Set the first value, move the playhead, then change the value to create the second keyframe automatically.
Linear movement can feel robotic. Add an ease in or ease out so elements accelerate and settle the way real objects do.
When several elements should animate the same way, build the animation once and paste the keyframes onto the others so the timing matches exactly.
Play your project back from start to finish to check the timing and easing of every animation before you render the final video.