Processing Options
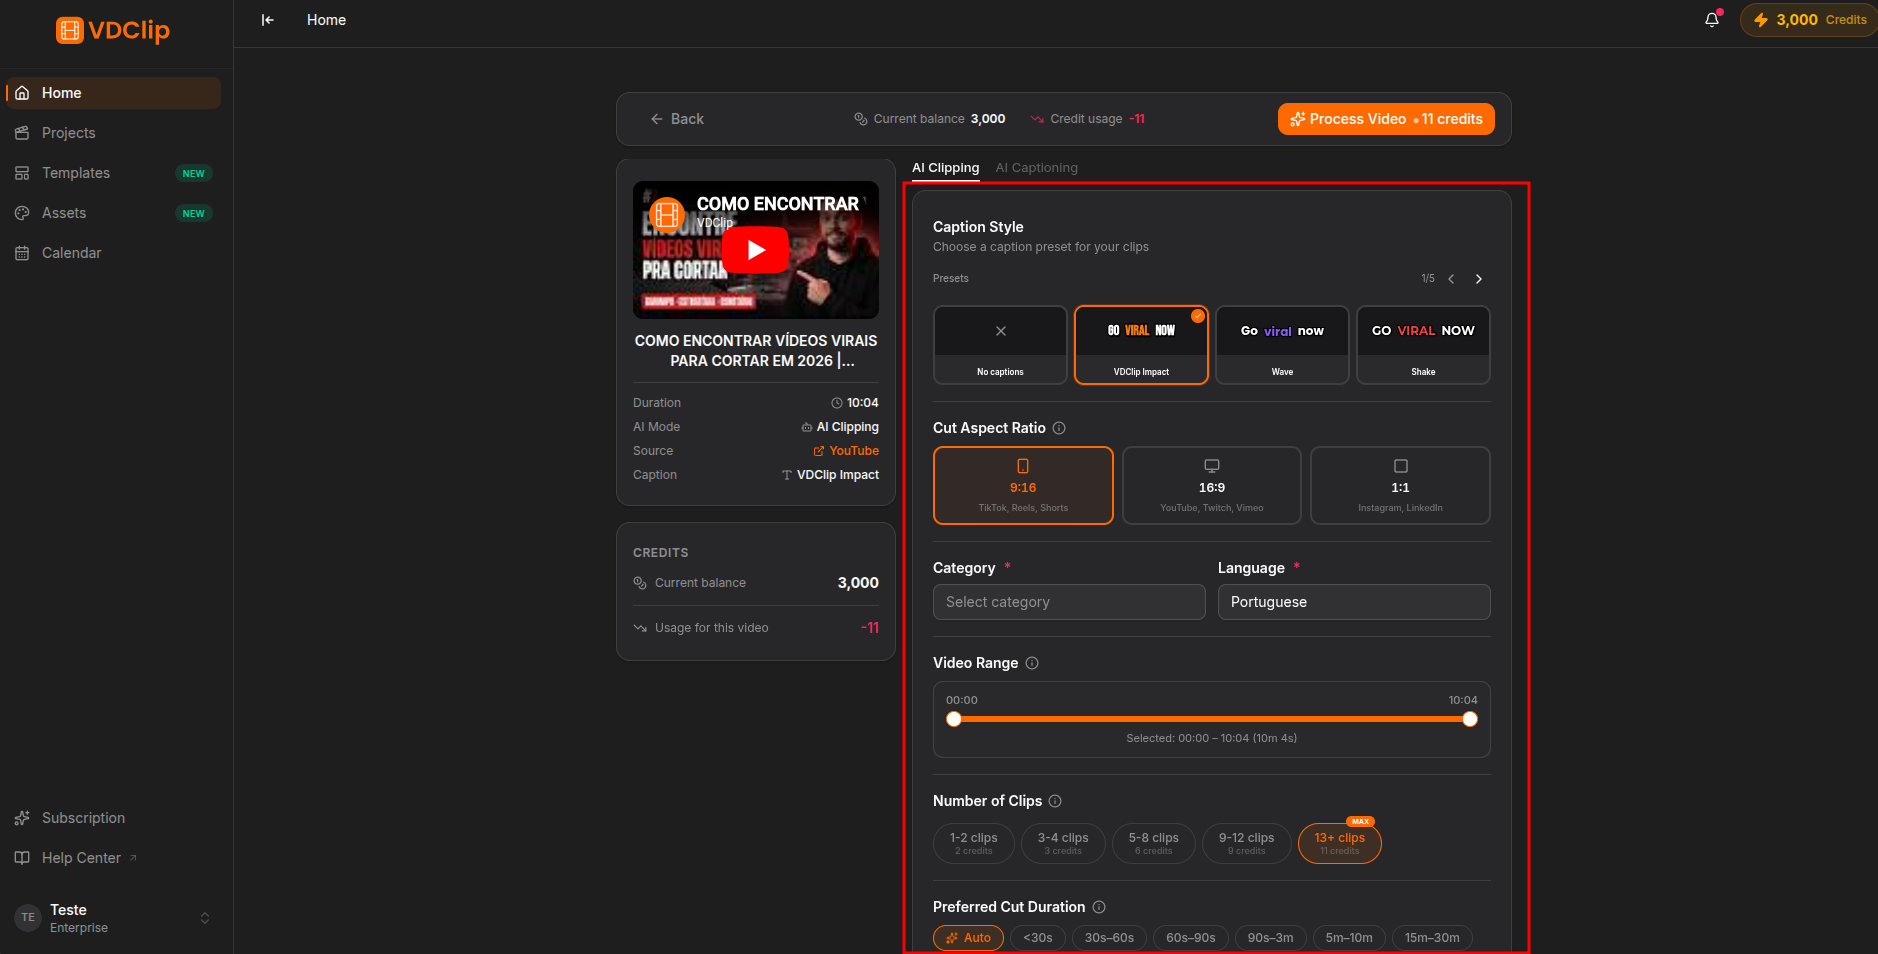
After submitting a video, VDClip shows a configuration screen before processing begins. This is where you tell the AI what kind of output you want - how many clips, their length, the language, and the visual style. The credit cost is calculated live based on your selections.
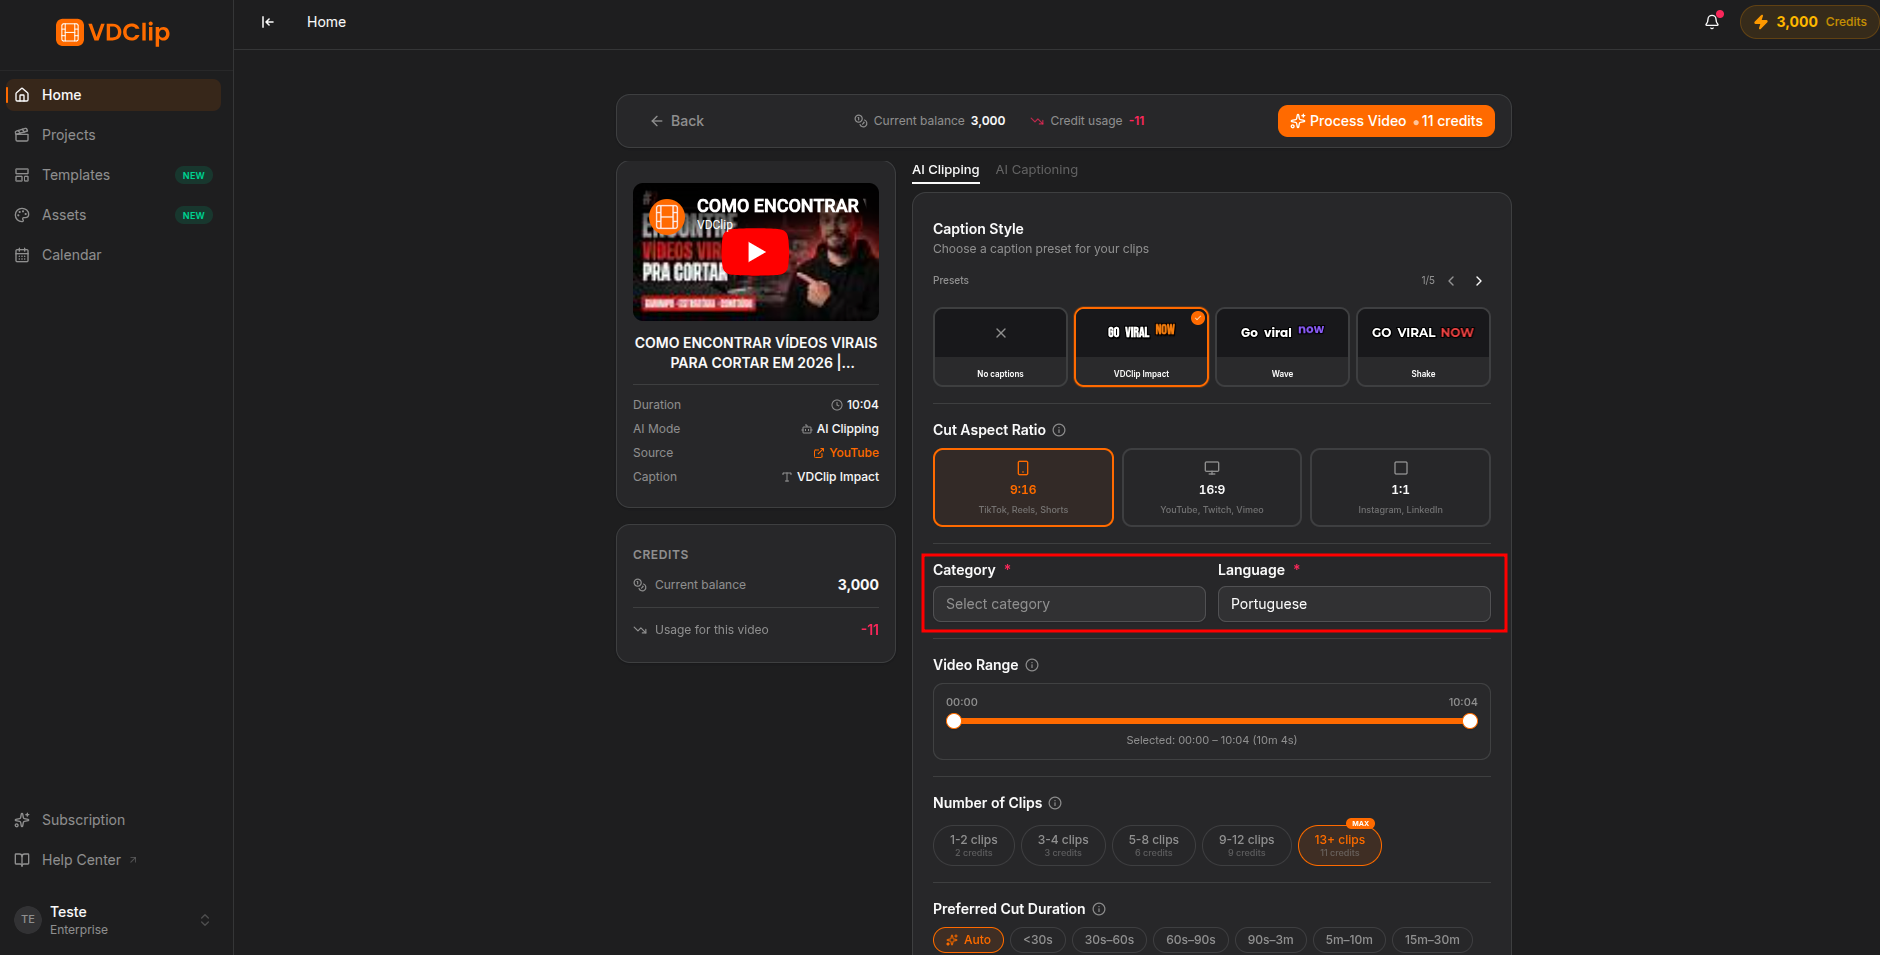
Category and Language
These two fields are required and directly affect the AI’s analysis quality.
Category tells the AI what kind of content it is - Podcast, Comedy, Tutorial, Gaming, Church, Interview, and so on. The AI uses this to better identify meaningful moments: a motivational speech has different “highlights” than a product review.
Language sets the transcription language. Selecting the correct spoken language improves clip titles, caption accuracy, and the relevance of extracted moments. If you are unsure, most languages will be detected automatically, but specifying it explicitly always yields better results.
Processing Mode (AI Clipping only)
When using AI Clipping, you can choose between two modes:
- Clips mode - the AI analyzes the video, finds the best moments, and generates multiple short clips. This is the standard mode for content repurposing.
- Full video mode - the AI processes the entire video as a single output, adding captions and styling without cutting. Use this when you want to add subtitles to the full video rather than cut it into clips.
AI Captions always uses full video mode - the clips/full toggle is not shown for that tool.
Video Range
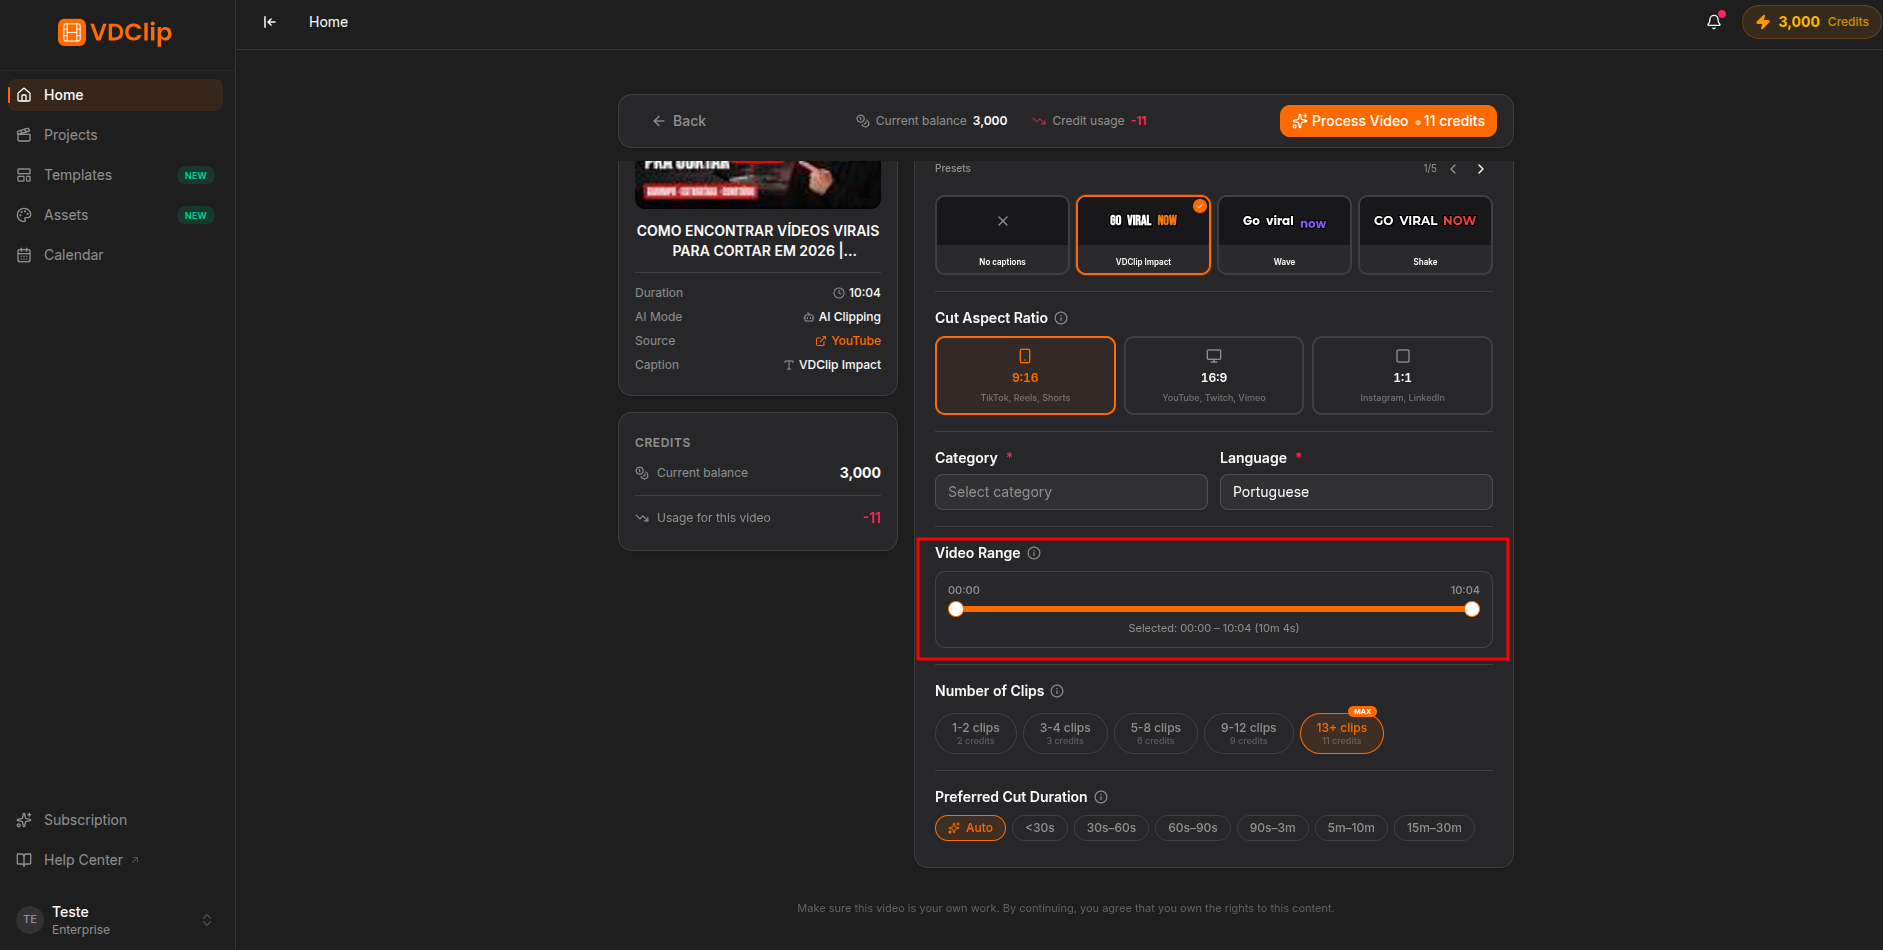
The range slider lets you define which portion of the video to process. By default the full video is selected, but you can drag the handles to restrict analysis to a specific segment - for example, minutes 5 to 35 of a 60-minute podcast.
Narrowing the range reduces the processing credit cost and focuses the AI on the most relevant content. The clip count selector updates automatically to match the selected duration.
Clip Count
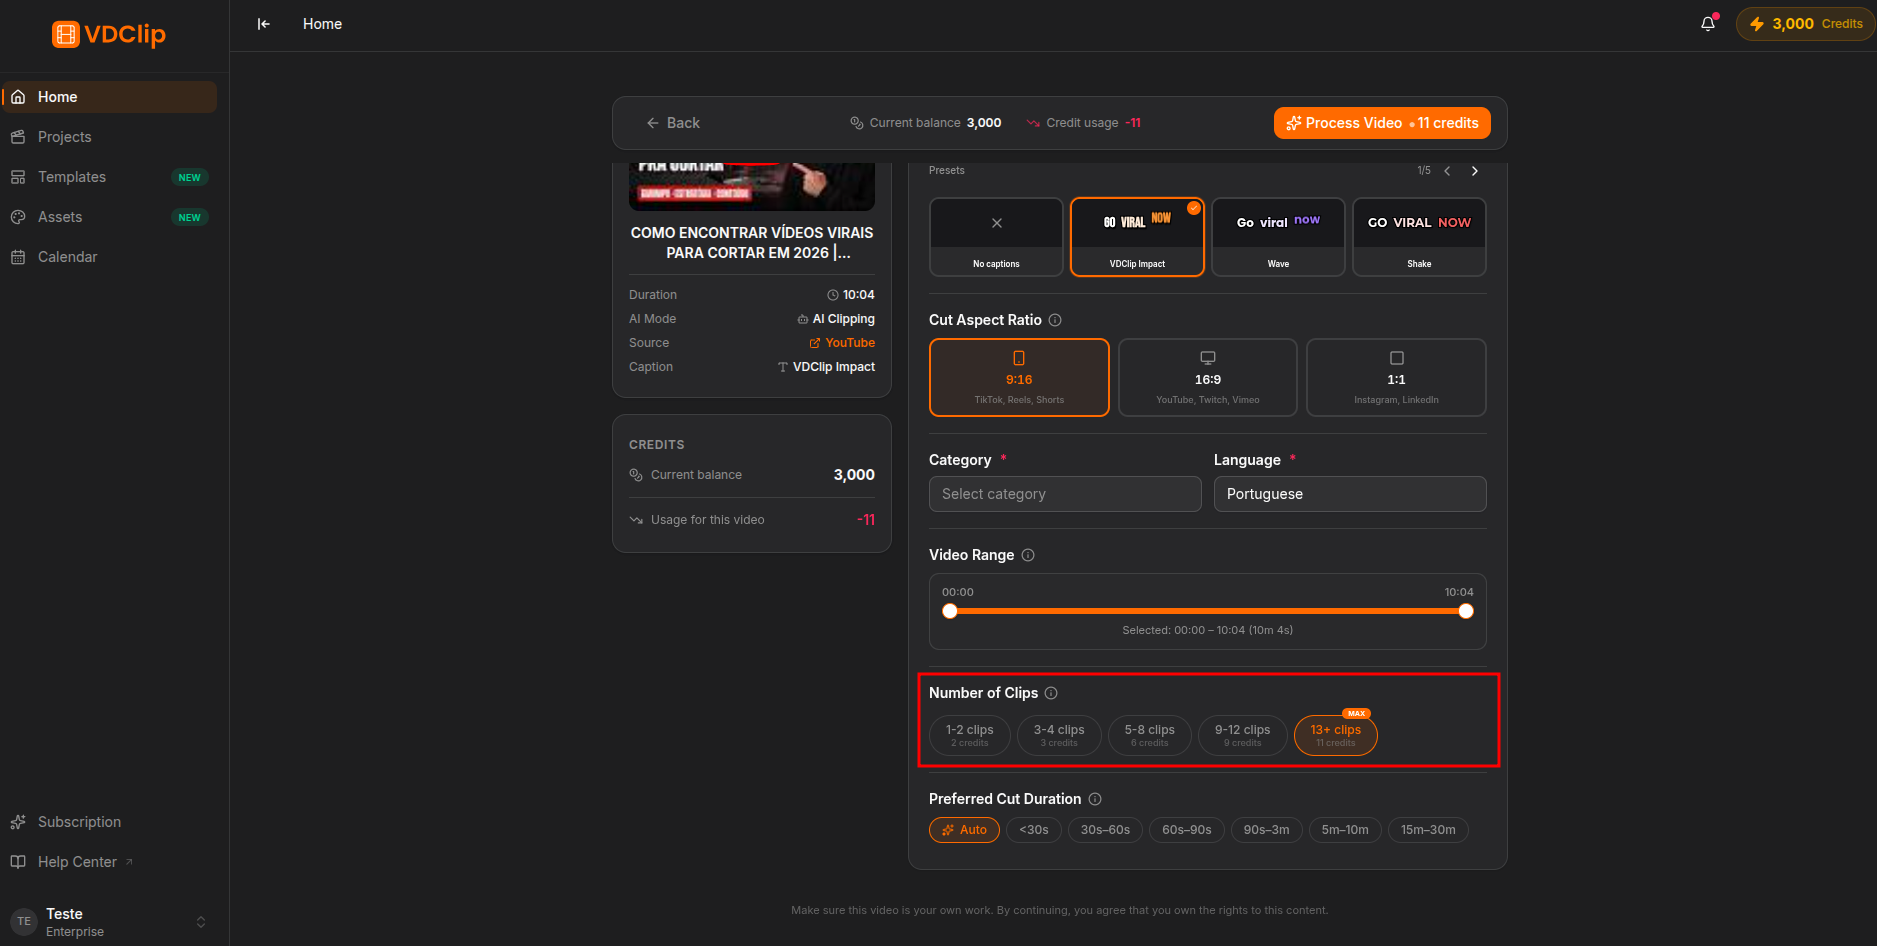
Shown only in Clips mode. The clip count selector presents a row of chips, each representing a range of clips the AI will try to generate - for example 3-5 clips, 5-8 clips, or 12+ clips (MAX).
The available chips scale with the video duration: a 3-minute video has fewer options than a 2-hour recording. Each chip shows the credit cost it requires. Chips that would exceed your current balance are grayed out and cannot be selected.
Selecting a lower count processes a proportionally shorter portion of the video, reducing the cost. Selecting MAX processes the full selected range and generates the maximum number of clips the AI can find.
Clip Duration
Also shown only in Clips mode. These chips filter which moments the AI considers based on their length:
AI decides the best duration per clip based on the content. Default option.
Very short clips - highlights, reactions, quick takes.
Standard short-form - TikTok, Reels, Shorts.
Slightly longer clips still suitable for Reels and TikTok.
Extended clips - LinkedIn, YouTube.
Long-form segments. Requires a paid plan.
You can select multiple durations at once. Selecting Auto deselects all others.
Template
Applying a saved template pre-fills the caption style, aspect ratio, and visual settings in one click. When a template is selected, the aspect ratio field synchronizes automatically to match the template’s layout.
You can also set caption style and aspect ratio directly on this screen without a template.
Aspect Ratio
Sets the output format for rendered clips:
TikTok, Reels, Shorts
YouTube, presentations
Instagram feed, Facebook
Instagram portrait feed
Caption Style
Pick a caption preset to apply to all clips from this video. You can further customize captions later in the editor.
Credit Cost
The summary bar at the bottom shows the estimated credit cost for the current configuration, updating in real time as you adjust clip count or range. Credits are deducted when you confirm and processing begins.
If processing fails or expires, credits are not charged. You can safely retry without losing credits on a failed attempt.
Category is the most impactful setting for clip relevance. Choosing the right category gives the AI the context it needs to find the best moments.
If your video has a long intro or outro you do not want clipped, narrow the range. You pay for what you process, not the full video.
Select multiple duration filters at once to cover more ground - for example, both 30 s-60 s and 60 s-90 s to get a mix of clip lengths.
If you process videos for the same channel regularly, create a template once and apply it here in one click.